Introduction
Google Maps provides a flexible way to integrate maps to provide directions, location information, and any other kind of stuff provided by the Google Maps API in your web application. Although there are some articles in CP explaining about maps, in my article I am going to provide information about the latest Google Maps API V3 version. In this article, we will see some of the common techniques that are used with Google Maps. In order to work with the code sample explained below, you need to have some basic knowledge about JavaScript and C#.
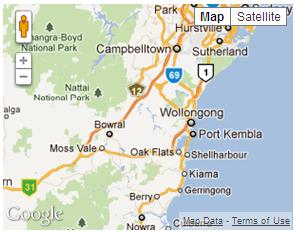
Your First Google Maps Map
In the earlier versions of the Google Maps API, as a developer we need to register the web application with Google and we were supposed to get an API key. However with the release of the new version, key registration has been eliminated for a few days for now, but recently, Google has come up with some kind of traffic limitations and we are supposed to register the application with an API Key. You can get more information about the usage of the API and the terms at this link:
http://code.google.com/apis/maps/documentation/javascript/usage.html#usage_limits. Now we will start our work and create a simple Google Maps map that can be integrated into our site. The following script is used to connect to the Google Maps API:
Hide Copy Code
<script type="text/javascript" src="http://maps.googleapis.com/maps/api/js?sensor=false">
</script>
In order to create a simple Google Map map, you can use the following JavaScript code:
Hide Copy Code
function InitializeMap()
{
    var latlng = new google.maps.LatLng(-34.397, 150.644);
    var myOptions = {
        zoom: 8,
        center: latlng,
        mapTypeId: google.maps.MapTypeId.ROADMAP
    };
    var map = new google.maps.Map(document.getElementById("map"), myOptions);
}
window.onload = InitializeMap;
Google Maps Options
In the above example, we used the Map class which takes options and an HTML ID as parameters. Now moving further, we will look at the map options:
Hide Shrink  Copy Code
function initialize() {
    var latlng = new google.maps.LatLng(-34.397, 150.644);
    var options =
    {
        zoom: 3,
        center: new google.maps.LatLng(37.09, -95.71),
        mapTypeId: google.maps.MapTypeId.ROADMAP,
        mapTypeControl: true,
        mapTypeControlOptions:
        {
            style: google.maps.MapTypeControlStyle.DROPDOWN_MENU,
            poistion: google.maps.ControlPosition.TOP_RIGHT,
            mapTypeIds: [google.maps.MapTypeId.ROADMAP,
              google.maps.MapTypeId.TERRAIN,
              google.maps.MapTypeId.HYBRID,
              google.maps.MapTypeId.SATELLITE]
        },
        navigationControl: true,
        navigationControlOptions:
        {
            style: google.maps.NavigationControlStyle.ZOOM_PAN
        },
        scaleControl: true,
        disableDoubleClickZoom: true,
        draggable: false,
        streetViewControl: true,
        draggableCursor: 'move'
    };
    var map = new google.maps.Map(document.getElementById("map"), options);
}
window.onload = initialize;
In the above example, all the properties of Map have been used. You can set the map options depending on your requirements.
The properties of the Map class are summarized in the following table:
| Property | Class |
MapTypeControl:true/false | mapTypeControlOptions
| Property | Constants/Values |
style | DEFAULT<br /> HORIZONTAL_BAR<br /> DROPDOWN_MENU |
position | BOTTOM<br /> BOTTOM_LEFT<br /> BOTTOM_RIGHT <br /> LEFT<br /> RIGHT<br /> TOP<br /> TOP_LEFT<br /> TOP_RIGHT |
mapTypeIds | ROADMAP<br /> SATELLITE<br /> Hybrid<br /> Terrain |
|
navigationControl:true/false | navigationControlOptions
| Property | Constants/Values |
Position | BOTTOM<br /> BOTTOM_LEFT<br /> BOTTOM_RIGHT<br /> LEFT<br /> RIGHT<br /> TOP<br /> TOP_LEFT<br /> TOP_RIGHT T |
style | DEFAULT<br /> SMALL<br /> ANDROID |
|
scaleControl:true/false | scaleControlOptions: scalecontroloptionshas the same properties as navigation control options (position, style) and behavior is also the same. |
disableDoubleClickZoom: true/false | |
scrollwheel: true/false | |
draggable: true/false | |
streetViewControl: true/false | |
Map Marker
The Marker class provides you with an option to display a marker to the user for a given location. Use of the marker is a very general task that we will use often in our application. The following example shows you how to create a simple marker.
Hide Copy Code
var marker = new google.maps.Marker
(
    {
        position: new google.maps.LatLng(-34.397, 150.644),
        map: map,
        title: 'Click me'
    }
);
Info Window
With the marker displayed on the map, you create an onclick event which provides the user with a popup window showing the information about the place. You can create an info window as shown below:
Hide Copy Code
var infowindow = new google.maps.InfoWindow({
content: 'Location info:
Country Name:
LatLng:'
});
google.maps.event.addListener(marker, 'click', function () {
infowindow.open(map, marker);
});
Combining them:
Hide Copy Code
var map;
function initialize() {
var latlng = new google.maps.LatLng(-34.397, 150.644);
var myOptions = {
zoom: 8,
center: latlng,
mapTypeId: google.maps.MapTypeId.ROADMAP
};
map = new google.maps.Map(document.getElementById("map"), myOptions);
var marker = new google.maps.Marker
(
{
position: new google.maps.LatLng(-34.397, 150.644),
map: map,
title: 'Click me'
}
);
var infowindow = new google.maps.InfoWindow({
content: 'Location info:<br/>Country Name:<br/>LatLng:'
});
google.maps.event.addListener(marker, 'click', function () {
infowindow.open(map, marker);
});
}
window.onload = initialize;
With this complete, you are going to create a map and then locate the region of the user, load the map with a marker and the info window.
Multiple Markers
In some cases, if you want to handle multiple markers, you achieve this like the following:
Hide Shrink Copy Code
function markicons() {
   InitializeMap();

        var ltlng = [];

        ltlng.push(new google.maps.LatLng(17.22, 78.28));
        ltlng.push(new google.maps.LatLng(13.5, 79.2));
        ltlng.push(new google.maps.LatLng(15.24, 77.16));

        map.setCenter(ltlng[0]);
        for (var i = 0; i <= ltlng.length; i++) {
            marker = new google.maps.Marker({
                map: map,
                position: ltlng[i]
            });

            (function (i, marker) {

                google.maps.event.addListener(marker, 'click', function () {

                    if (!infowindow) {
                        infowindow = new google.maps.InfoWindow();
                    }

                    infowindow.setContent("Message" + i);

                    infowindow.open(map, marker);

                });

            })(i, marker);

        }
}
Directions
One of the most useful features of the Google Maps API is it can be used to provide directions for any given location(s). The following code is used to accomplish this task:
Hide Shrink Copy Code
var directionsDisplay;
var directionsService = new google.maps.DirectionsService();

function InitializeMap() {
    directionsDisplay = new google.maps.DirectionsRenderer();
    var latlng = new google.maps.LatLng(-34.397, 150.644);
    var myOptions =
    {
        zoom: 8,
        center: latlng,
        mapTypeId: google.maps.MapTypeId.ROADMAP
    };
    var map = new google.maps.Map(document.getElementById("map"), myOptions);

    directionsDisplay.setMap(map);
    directionsDisplay.setPanel(document.getElementById('directionpanel'));

    var control = document.getElementById('control');
    control.style.display = 'block';


}
    function calcRoute() {

    var start = document.getElementById('startvalue').value;
    var end = document.getElementById('endvalue').value;
    var request = {
        origin: start,
        destination: end,
        travelMode: google.maps.DirectionsTravelMode.DRIVING
    };
    directionsService.route(request, function (response, status) {
        if (status == google.maps.DirectionsStatus.OK) {
            directionsDisplay.setDirections(response);
        }
    });

}

function Button1_onclick() {
    calcRoute();
}

window.onload = InitializeMap;

Layers
The Google Maps API provides you with multiple layer options of which one is bicycle. By using the bicycle layer, you can show bicycle paths for a particular location on the map to users. The following code snippet allows you to add a bicycle layer to a map.
Hide Copy Code
var map
function InitializeMap() {
    var latlng = new google.maps.LatLng(-34.397, 150.644);
    var myOptions = {
        zoom: 8,
        center: latlng,
        mapTypeId: google.maps.MapTypeId.ROADMAP
    };
   map = new google.maps.Map(document.getElementById("map"), myOptions);
}
window.onload = InitializeMap;
var bikeLayer = new google.maps.BicyclingLayer();
bikeLayer.setMap(map);
Gecoding
So far we have learned the basic concepts of creating Google maps and displaying information about a location to the user. Now we will see how we can calculate/find a location specified by the user. Geocoding is nothing but the process of finding out the latitude and longitude for a given region. The following API code shows you how to find the latitude and longitude for a location.
Hide Copy Code
geocoder.geocode({ 'address': address }, function (results, status) {
    if (status == google.maps.GeocoderStatus.OK) {
        map.setCenter(results[0].geometry.location);
        var marker = new google.maps.Marker({
            map: map,
            position: results[0].geometry.location
        });

    }
    else {
        alert("Geocode was not successful for the following reason: " + status);
    }
});
Geocoding C#
The same calculation can also be performed by using C#:
Hide Shrink Copy Code
public static Coordinate GetCoordinates(string region)
{
    using (var client = new WebClient())
    {

        string uri = "http://maps.google.com/maps/geo?q='" + region +
          "'&output=csv&key=ABQIAAAAzr2EBOXUKnm_jVnk0OJI7xSosDVG8KKPE1" +
          "-m51RBrvYughuyMxQ-i1QfUnH94QxWIa6N4U6MouMmBA";

        string[] geocodeInfo = client.DownloadString(uri).Split(',');

        return new Coordinate(Convert.ToDouble(geocodeInfo[2]),
                   Convert.ToDouble(geocodeInfo[3]));
    }
}

public struct Coordinate
{
    private double lat;
    private double lng;

    public Coordinate(double latitude, double longitude)
    {
        lat = latitude;
        lng = longitude;

    }

    public double Latitude { get { return lat; } set { lat = value; } }
    public double Longitude { get { return lng; } set { lng = value; } }

}
Reverse Geocoding
As the name indicates, it is the reverse process of geocoding; that is depending on the latitude and longitude, we can find the location name. This can be achieved using the following code:
Hide Shrink Copy Code
var map;
var geocoder;
function InitializeMap() {
var latlng = new google.maps.LatLng(-34.397, 150.644);
var myOptions =
{
zoom: 8,
center: latlng,
mapTypeId: google.maps.MapTypeId.ROADMAP,
disableDefaultUI: true
};
map = new google.maps.Map(document.getElementById("map"), myOptions);
}
function FindLocaiton() {
geocoder = new google.maps.Geocoder();
InitializeMap();
var address = document.getElementById("addressinput").value;
geocoder.geocode({ 'address': address }, function (results, status) {
if (status == google.maps.GeocoderStatus.OK) {
map.setCenter(results[0].geometry.location);
var marker = new google.maps.Marker({
map: map,
position: results[0].geometry.location
});
if (results[0].formatted_address) {
region = results[0].formatted_address + '<br/>';
}
var infowindow = new google.maps.InfoWindow({
content: 'Location info:<br/>Country Name:' + region +
'<br/>LatLng:' + results[0].geometry.location + ''
});
google.maps.event.addListener(marker, 'click', function () {
infowindow.open(map, marker);
});
}
else {
alert("Geocode was not successful for the following reason: " + status);
}
});
}
Reverse Geocoding in C#
The following C# code shows you the reverse geocoding technique:
Hide Copy Code
static string baseUri =
  "http://maps.googleapis.com/maps/api/geocode/xml?latlng={0},{1}&sensor=false";
string location = string.Empty;

public static void RetrieveFormatedAddress(string lat, string lng)
{
    string requestUri = string.Format(baseUri, lat, lng);

    using (WebClient wc = new WebClient())
    {
        string result = wc.DownloadString(requestUri);
        var xmlElm = XElement.Parse(result);
        var status = (from elm in xmlElm.Descendants() where
            elm.Name == "status" select elm).FirstOrDefault();
        if (status.Value.ToLower() == "ok")
        {
            var res = (from elm in xmlElm.Descendants() where
                elm.Name == "formatted_address" select elm).FirstOrDefault();
            requestUri = res.Value;
        }
    }
}
Conclusion
In this article, I have tried to explain some of the basic and most frequently used tasks of the Google Maps API V3. Hope this article will help you in completing your tasks. Further, there are lot more things in the API which I have not discussed and I would try to include them in my future updates of this article. Any comments and feedback are always welcome.
External Resources